Monthly Archives: March 2010

Digestives

Firstly, thanks to everyone who’s just as excited as I am about having my sister home! And the cookbooks! I’ll have the post up on those soon, oh, and along with my “to-bake” wishlist.

Actually, today I have a recipe to share from one of the books she got me *already!* I really couldn’t keep my flour covered hands off the books. In fact, I’ve been pretty good lately, baking from all sorts of books, not leaving any of them out. It’s an accomplishment as many of you will probably understand since it’s really quite testing to not show favouritism to a particular book.

My secret book loves are Rose Levy Beranbaum’s Cake Bible and Heavenly Cakes, Donna Hay’s Modern Classics 2, Sherry Yard’s Desserts by the Yard, Carole Bloom’s The Essential Baker, Jennifer Graham’s The Crabapple Cupcake Cookbook and Sur La Table’s The Art and Soul of Baking.

What are you secret loves? Oh do tell…

On to yummier things, I baked digestives today and for most people, this may be quite a strange thing to bake. Afterall, McVitie’s makes the BEST chocolate covered digestives. I love mine eaten cold, from the fridge, so the chocolate has set into fudge and holds up when I dunk it into my Milo (malted chocolate drink).

But being gluten free means no, no and er…no digestives. What a bummer. Actually, I think the initial stage of becoming gluten free turns you into ‘no’ lady (or man). You practically have to say no to everything! And worse, the people who render you food-impossible. Meh, not cool.

Well these digestives are very, very tasty, just like the packaged ones but better. I find that it doesn’t have that ‘odd’ aftertaste I used to get with the packaged ones. And the chocolate I coated it in? No vegetable fat, just pure 55% couverture chocolate. Talk about snobby digestives! I now have mine cold, sitting in the fridge, waiting for me to sink my teeth into them. And the un-chocolate-d ones would make the greatest cheesecake crust if I dare say so myself.

Prepare for dunkage!

Better Gluten Free Digestives. makes 35-40 (adapted from River Cottage Everyday by Hugh Fearnley-Whittingstall)

*Gluten-free and Egg-free

125g trans-fat free shortening, softened and cubed
125g butter, softened and cubed
1 1/2 cup GF flour blend
1/4 cup buckwheat flour
250g medium oats (I pulsed GF oats in the food processor for 15-20 seconds)
35g brown sugar
1 tsp baking powder
2 tsp fine sea salt
1-2 tbsp almond milk (any milk’s fine)

1) Preheat oven to 180 degreesC. Grease and line 2 cookie pans with parchment

2) Pulse the butter, shortening and flours in a food processor until it resembles breadcrumbs

3) Add in the sugar, oatmeal, salt and baking powder. Pulse 3 times, 3 seconds each.

4) Pour the dough into a big bowl and using your hands, knead it lightly. Add in 1 tbsp of milk and mix in using your hands. Dough should be slightly sticky, enough to hold together when rolled into a ball. If not, add in more milk, 1 drop at a time.

5) Roll tablespoonfuls of the dough into balls (about 17-18g, I weighed it!) and place onto cookie sheet. FillĀ  bowl with 1 cup of icing sugar and dip the flat bottom of a glass into the sugar, and press down onto the dough ball to flatten it to about 4-5 mm thick. If it’s too thin, it tends to be too fragile after baking. Dip the glass bottom into icing sugar again and repeat.

6) Before baking, carefully hold the baking tray and the parchment at a angle and lightly tap the tray against the table to remove excess icing sugar from the cookies. Bake for 12-15 mins, or until cookies are fairly firm when touched. They don’t brown too much so colour may not be the best way to test for done-ness. Cool completely on the tray.

7) If you’d like chocolate covered digestives, melt 120-150g of 55% chocolate and let cool to room temp. Then, using a rubber spatula, gentle spread half the cooled cookie surface with the chocolate and place in a single layer, to chill in the fridge until set. Where I live is really warm so I’ve been keeping those in the fridge., The un-chocolate-d ones are good in an airtight container, on the kitchen counter, for hungry, wandering hands.

9 Comments

Filed under Books, Chocolate, Cookies, Recipes

Fork and Fingers Cake

There is a reason for the title of this post and I will get to it soon. Promise.

But in the mean time, I have exciting news to share! Yesterday couldn’t come soon enough. The whole household was excited, a little like how we feel during an extremely festive season, but this time, even better! This particular festive season would last for 3 weeks and she came bearing gifts! *drumroll* My little sister’s home from London for three weeks! (before term starts again). Exciting huh? And she bought me cookbooks too! Lucky me.

Don’t worry, I made sure there was home-baked cake for her. I even made sure there was cake incase we woke up at an ungodly 4am in the morning because she’s hungry. We did wake up, but couldn’t muster enough energy to head to the kitchen for an early morning snack. I fell right back to sleep.

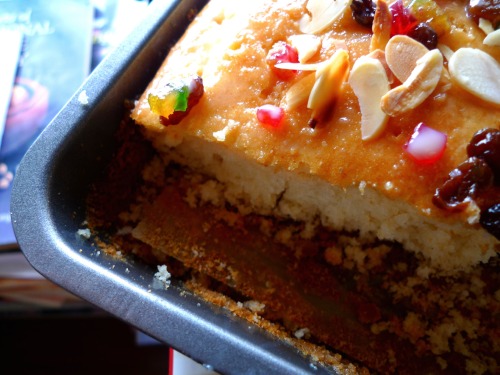
Now, onto the title of this post. It’s how this cake is intended to be enjoyed- using a fork and your fingers. Fork; for the larger pieces and fingers; for the bits that will inevitably crumble onto your plate. It’s more like a butter/tea cake studded with jewel-toned candied fruit and a healthy drizzle of condensed milk for a dash of richness and moisture. Best eaten lightly warmed, and be prepared for crumbs, which make the eating process last longer (who’s complaining?)

Jems and Jewels Teacake (inspired by christmas, Boucheron and Rose Levy Beranbaum)

5 large egg yolks
1/2 + 2 tbsp caster sugar
2 tbsp sweetened condensed milk with enough regular milk to make 3/4 cup
1 tsp vanilla extract
2 1/4 cups GF flour blend
1/4 cup almond meal
3 tsp baking powder
pinch of salt
1/2 cup veg oil
1 cup candied fruit

1) Begin this 15 minutes earlier: Rinse the candied fruit, drain, and soak in 2 tbsp rum for 10 mins. Drain.

2) Preheat oven to 180 degreesC, fan-forced. Grease and line a 10-cup rectangle tin with parchment.

3) In the bowl of a KitchenAid, beat the yolks and the sugar until creamy (about 2 mins)

4) Meanwhile, sift the flour, salt and baking powder in a large bowl. Add in the almond meal. Mix to blend.

5) Add the oil into the egg mixture and beat for 30 seconds, or until well emulsified.

6) Add in the flour and milk mixture alternately, in 3 additions. Remember to scrape down the sides of the bowl (as I always forget to!)

7) Finally, add in the drained fruit and beat for 30 seconds on high. Pour into the prepared tin and bake for 35-40 mins.

8) Cool in the tin (I didn’t bother removing it since it was really tender and fragile. While warm, using a skewer, poke random holes over the cake. Mix 3 tbsp sweetened condensed milk, 2 tbsp warm water and 2 tbsp icing sugar. Brush all over the cake, ensuring to get the glaze to every corner. If desired, toast 1/2 cup almond flakes and sprinkle all over the cake, along with 1/4 cup candied fruit (do not rinse).

9) Enjoy it warmed, with Earl Gray tea. Remember to use your fingers for the crumbs!

PS: Entertainment news of the day: Lady Gaga is at the forefront of hair curling technology. Soda cans! (according to her Telephone video)

16 Comments

Filed under Cakes, Fruit, Recipes

A Zig Zac

I’m going to let you in on a secret. Come closer.

Ready? Ok.

I’ve never had an Anzac cookie before. Why is this a big deal? Simply because I lived where the cookie originated from! Imagine, every year, during Anzac day, while everyone had their day off, commemorating the friendship between the Australia and New Zealand, I worked for the double pay and never had an Anzac cookie. Sad stuff. Luckily I’ve had a lamington before, albeit a really dry version from Coles.

Another shocking discovery? I’ve never had Vegemite! Again, have I been living under a rock? To be fair, I’m allergic to the ingredients found in this spread. Apparently it is THE BOMB with crusty toast, thick lashing of butter and a healthy smear of the stuff. I know The Boy’s recently fallen for it, eating it just like his dad does. Am I missing something?

What other national-worthy dishes are there?

I agree with pancakes, maple syrup and bacon. Love my soy beancurd with black jelly(Singaporean hawker dessert at it’s best). So I really should check this whole Vegemite thing out. Anyway, back to the Anzacs, long story short, I finally made them, perfumed the whole house with caramel tinted butter and ate my weight in it before I could get it to the office.

I used Donna Hay’s recipe because who better to trust with a national icon than the iconic Aussie herself. oats + butter, golden syrup, coconut = love. I feel as if history has just been made.

Gluten-free Anzac Cookies (adapted from Modern Classics 2 by Donna Hay)

1 cup rolled oats (GF oats)
1 cup GF flour blend
1 tbsp cornstarch
1/3 cup brown sugar
3/4 cup dessicated coconut
2 tbsp golden syrup (I doubt mine was super accurate since it got messy)
125g butter
1/2 tsp bicarb soda
1 tbsp hot water

1) Preheat the oven to 160 degreesC. Line 2 cookie pans with parchment.

2) In a large bowl, mix the oats, flour, cornstarch, coconut and sugar together.

3) In a medium saucepan, melt the golden syrup and butter. Careful not to boil/burn it. Take off the heat. Mix the bicarb soda andf water together. Pour into the butter mixture.

4) Pour the butter mixture into the dry ingredients, stirring as you go. Mixture will look ‘crumbly’, not very much like a typical batter.

5) Drop tablespoonfuls of the batter onto the parchment, trying your best to keep the batter together (it will seem fairly crumbly but will come together while baking)

6) Bake for 10-12 minutes. Cool on wire rack. Eat and be transported to Australia immediately.

19 Comments

Filed under Cookies, Recipes

Plum Galette

Today, the boy asked me a question he’s never asked me before. “How are you coping with being this long-distance relationship?”

Me: ugghh, hate it! I can’t get used to it.

Him: It’ll help you cope better though!

Me: But then it means I’ll have to be ok with it. I don’t think so…

Okay, our conversation above got me thinking. If we all settled for options that made our lives easier just because, doesn’t it mean we’re not working towards a better situation. Like, if all of us GF-ers settled for tasteless, dense and gummy cake, how miserable would we be? Or if I said I’m just not that smart, does that mean not being a doctor equals epic fail?

Not quite. And I proudly say that whatever I am today, is a result of not just settling.

Onto more delicious things, I finally made a pie crust that IS a pie crust. No gummy, leaky bottoms, no buttery mess, no tasteless heap. Granted, it isn’t the best pie crust I envisioned making, but it’s so much better than all my other attempts that have left me exasperated and annoyed. It was sticky to work with, tricky to roll out (so I didn’t, just patted it out), but guess what? That’s the beauty of making a galette, it’s supposed to look homemade, slightly rustic, and unevenly edged.

I got the recipe from one of my new books, The Art and Soul of Baking from Sur La Table. It’s a heavyweight (physically and mentally) and got me flipping over and over, trying to decide which recipe to have a go at. I’ve bookmarked the cream scones and velvet chocolate pound cake.

Onto the recipe…

Gluten Free Pie Crust (adapted from The Art and Soul of Baking from Sur La Table)

125g butter, cut into small cubes and frozen
2 tbsp caster sugar
1 cup + 2 tbsp GF flour blend
2 tbsp sweet rice flour (glutinous rice flour)
pinch of salt
2-4 tbsp water, ice cold

1) In a large food processor, mix the flour, sugar and salt. Whizz for 2 seconds.

2) Tip the butter into the processor and whizz for 5 seconds, 3 times. Check the consistency. It should resemble peas and sand. If not, whizz a couple more times

3) Tip the mixture into a large bowl and add in 2 tbsp of water. Using a fork, fluff the mixture until it begins to come together. Using your hands, squeeze a bit of the mixture to see if it comes together as a dough. If it is dry and very crumbly, add in half a tbsp of water and fluff again. Repeat the squishing test. I added 3 tbsp of water in total.

4) Turn the dough out onto the tabletop, dusted with flour mix, and knead briefly. Mine was veryvery soft so after a quick mix, I placed it back into the bowl, covered it with clingwrap and refrigerated it for 30mins.

To Make the Plum Galatte:

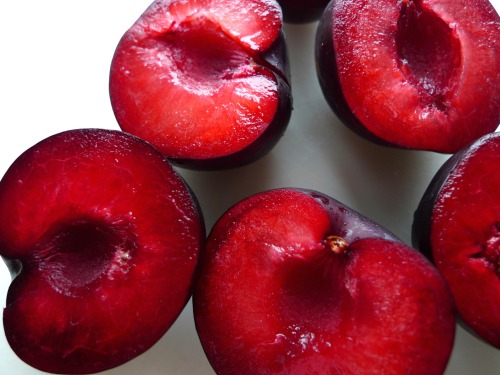
3-4 medium plums, stoned and sliced into 12 slices
2 tbsp blackberry/blueberry/marionberry jam, lightly warmed
3 tbsp raw sugar
half batch pie crust

1) On a baking paper lined baking tray, pat the pie crust out, about 1/4 inch thick.
2) Spread the jam onto the crust, leaving a 3-4 cm edge. Arrange the plum slices onto the jam. Sprinkle the sugar over the plums.
3) Fold over the edge. If you find it sticky, use a floured plastic scraper to help you.
4) Preheat the oven to 180 degreesC. Place galette in the fridge.
5) When preheated, bake galette for 35-40 mins, or until edges are golden n plums have shriveled slightly.

12 Comments

Filed under Books, Breakfast, Fruit, Recipes

The Bee’s Knees

It’s Saturday. Not only that, it’s Saturday morning. The morning that fills me up with endless hope and possibility because the weekend is here. 2 days of doing whatever my heart desires. Of catching up with friends, baking more than usual, a little shopping (or alot), slow dinners and to please my inner child- staying up late!

It’s awesome how Saturday can me feel all sorts of things that bring a smile to my face. So much so that my body clock decides to be extra generous and wake me from my slumber a little earlier (7.15am) just so my Saturday morning lasts longer. FYI: I totally wouldn’t have minded sleeping until 8am.

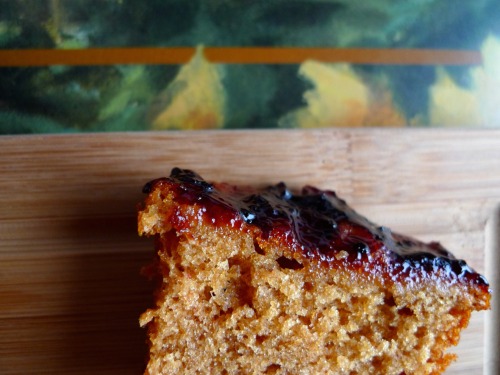
Luckily for me, I have cake to soothe my slightly unnerved self. The perfect breakfast sort of cake, sweetened with honey and then a thick coating of blackberry jam slathered on. My mum had a stroke of utter genius when she suggested that the last honey loaf be covered in peanut butter followed by the jam. I got you there didn’t i?


I’ve been on a shopping spree lately, 5 books in the last 2 weeks, mainly because the bookstores caught me by my feet and literally dragged me in with their discounts. This Rosh Hashanah Honey Cake is from Nancie McDermott’s Southern Cakes. I’m guessing it’s typically served during the Jewish New Year (Rosh Hashanah).

I thought the cake would taste far too honey-fied if eaten in largER amounts so the sour blackberry jam tones the sweetness down while still allowing the flavour of the spiced cake to shine. I wouldn’t particularly choose it for a dessert but it’s quite decadent after I ‘destroyed’ it with peanut butter and jam. On it’s own, it’s definitely breakfast and afternoon tea worthy!


Gluten Free Honey Cake with Blackberry Jam (adapted from Southern Cakes by Nancie McDermott)

1 Ā½ cup GF flour blend
Ā¼ cup almond meal
1 tsp baking powder
Ā¼ tsp baking soda
Ā½ tsp cinnamon
1 cup honey
2 eggs
Ā¼ strong coffee (cold)
3 tbsp canola oil
1 tbsp almond milk

1)Ā Ā Ā Ā Ā  Preheat oven to 170 degreesC. Grease and line a 9 by 2 inch loaf pan with parchment (I used 6 mini loaf tins)

2)Ā Ā Ā Ā Ā  In a large bowl, sift the flour, baking soda and baking powder. Add in the almond meal and cinnamon. Mix well.

3)Ā Ā Ā Ā Ā  In the bowl of a KitchenAid, fitted with a paddle attachment (you can do this with a hand whisk as well), mix the eggs and brown sugar until creamy. Add the oil, mix until emulsified.

4)Ā Ā Ā Ā Ā  Add in the coffee and half the honey to the egg batter. Mix well. Add in half the flour.

5)Ā Ā Ā Ā Ā  Add in the remaining honey and almond milk and the remaining flour. Mix until just incorporated. Mixture will be on the thin side.

6)Ā Ā Ā Ā Ā  Pour the batter into the loaf pan or divide evenly between 6 mini loaves. Bake for 45-50 mins (loaf) or 30-35 (mini loaf).

7)Ā Ā Ā Ā Ā  Let cool for 20 mins in tin before removing. When completely cool, spread 2- 3 tbsp of warmed blackberry jam over the top or divide amongst 6 mini loaves. Jam layer should be substantial and thick!

14 Comments

Filed under Breakfast, Cakes, Fruit, Recipes

Redred Velvet

Can I share a secret with you?

I’m in love with Rose Levy Beranbaum. I think she’s the greatest cookbook writer ever! Ok, enormous claim to make since I also feel similarly about Nigel Slater and Carole Bloom. And I’m slowly developing feelings for Donna Hay and ļ»æHugh Fearnley-Whittingstall.

I have also secretly been wanting Rose’s new book- Rose’s Heavenly Cakes. Really, that’s two secrets in one! LUCKY YOU. And when I finally bought it this Sunday, let’s say the addition of glossy, coloured photos could only lift my happy feelings to lofty heights, and make the itch to bake, well, itchier.

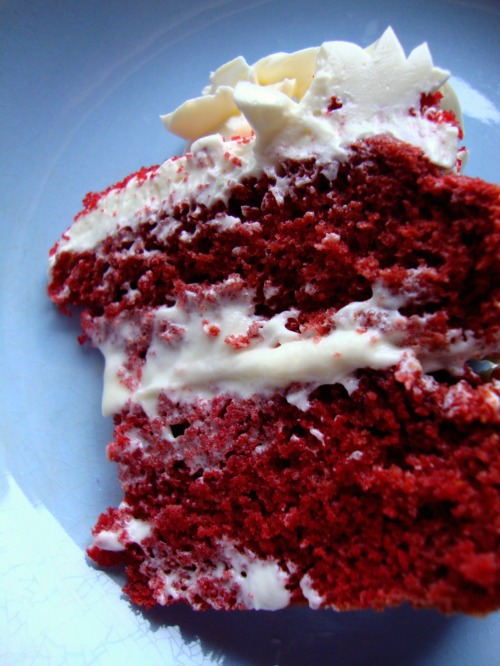
For my first cake from her deliciously thoroughly written book, I made ROSE RED VELVET CAKE. Red velvet may not be popular around here, it really is quite unique to America, but it’s delicious. I just wish people know what it tasted like because it’s hard to describe.

The Boy: How does it taste like?
Me: Hmm, it’s red. It’s slightly cocoa-y. Oh and I love the frosting. And it’s red.
The Boy: It tastes red? Oh cocoa. Like chocolate?
Me: No, not quite chocolatey.

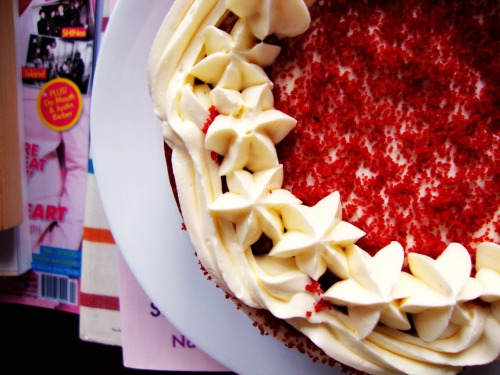
It’s a sweet RED cake that features a tinge of cocoa that adds dimension. But trust me when I say you’ll understand how something can “taste” red. I didn’t use Rose’s Dreamy Creamy White Frosting because I was craving vanilla frosting so I made a batch of vanilla- white chocolate Swiss meringue buttercream (feel free to omit the white chocolate, I get lazy like that sometimes)

Rose Red Velvet Cake (Adapted gluten free by Sweets by Vicky)

3 large egg whites (90g)
1 tbsp red food gel (Rose suggests 1 bottle of normal colouring)
1 tsp vanilla extract
2 cups – 2tbsp GF flour
3/4 cup caster sugar
3 tsp baking powder
2 tbsp cocoa powder (I used dutch-process)
pinch of salt
1/3 cup canola oil
1/2 cup + 2 tbsp buttermilk

1) Preheat the oven to 180 degreesC, fanforced. Grease and line 2 x 6 inch round baking tins or one 9 inch round cake tin.

2) In a large bowl, sift the flour, cocoa powder, baking powder, salt together.

3) In the bowl of a kitchenaid, whisk the eggs whites until foamy (bubbles should be quite dense). Add in the sugar and whisk for another 30 seconds on low. Add in the oil and whisk to combine (15 seconds)

4) Add the vanilla and red food gel to the liquid mix. Add in the flour mix and buttermilk alternately, starting and ending with the flour mix. Beat for 30 seconds after each addition. Don’t forget to scrape down the bowl!

5) Divide the mixture equally between the 2 pans (or the 1) and bake for 25-30 minutes or untile a skewer inserted comes out clean.

6) Let the cake cool in the pan on a wire rack for 10 minutes before loosening the edges and inverting. Invert back upright and cool completely.

7) Once cool, trim the tops with a serrated knife and keep the scraps. Frost between the layers and over the cake with Swiss Meringue Buttercream

Cake keeps best in the fridge for 3 days, in an airtight container. Let cake come to room temperature before serving as hard buttercream is kinda…gross. NOM NOM NOM!

17 Comments

Filed under Cakes, Chocolate, Frostings, Recipes

We’re All Mad Here

This isn’t a post about Alice in Wonderland, but I do feel slightly mad. Angry kind of mad, and confused, spiral-eyed kind of mad.

And it’s all the fault of this friand recipe I posted awhile ago. I’ve made it 3 times after my first attempt and none, absolutely none, have turned out the same way it did. Beginner’s luck? Or maybe I should try again tomorrow, this time making sure to use LARGE eggwhites. I keep getting these weird raised parts on the underside of the friand, signs that I may have overmixed it. So I made sure to keep a light hand, but no luck. Maybe the friand fairies weren’t on my side…for my past 3 attempts.

No friand, you will not defeat me!

So as I stared, quite confused, at my odd, dryish, weird bottomed friands, I mindlessly picked at these two-toned, confused-as-well cookies. They couldn’t decide if they wanted to be nutella or plain. If I were a cookie, I’d be confused too.

The cookies were based loosely on Alton Brown’s The Chewy. While I was expecting thick, sturdy, chewy cookies, Mine came out…candy-like, flat, chewy (for parts that weren’t too flat) but in an odd way, quite addictive. I’m highly certain it wasn’t meant to turn out this way, but a yummy cookie is a yummy cookie. The exterior is crisp, almost sugary-candy-like. It doesn’t hold well (crumbly) so I advise that you keep the cookies on the small side. Mine spread ALOT, reaching it’s greedy cookie-batter arms out to it’s neighbours. So, don’t bake them too close to each other. Or perhaps you could be more patient and chill them for a longer time.

Mad Cookie (inspired by Alton Brown’s The Chewy)

1 stick of butter, melted
1/4 cup cornstarch
3/4 cup GF Flour blend
1/2 tsp baking soda
2 tbsp caster sugar
1/3 cup brown sugar
1/2 egg
1/2 egg yolk
1 tbsp milk
1 tsp vanilla
1 cup semisweet chocolate chips
1/4 cup walnuts, chopped roughly
3 tbsp nutella

1)Ā Ā Ā Ā Ā  Heat oven to 375 degrees F.

2)Ā Ā Ā Ā Ā  Sift together the flour, salt, and baking soda and set aside.

3)Ā Ā Ā Ā Ā  Pour the melted butter in the bowl of a Kitchenaid. Add the sugar and brown sugar. Cream the butter and sugars on medium speed. Add the egg, yolk, 1 tablespoon milk and vanilla extract and mix until well combined. Slowly incorporate the flour mixture until thoroughly combined. Stir in the chocolate chips.

4)Ā Ā Ā Ā Ā  Remove half the batter, and place in a separate bowl. Add in the nutella and combine thoroughly.

5)Ā Ā Ā Ā Ā  For the remaining half of the batter, add the chopped walnuts and mix well.

6)Ā Ā Ā Ā Ā  Chill the dough (at least 1 hr), then scoop onto parchment-lined baking sheets. Place half a tbsp of the nutella batter next to another half tbsp of walnut batter so they are ā€˜joinedā€™ together. Bake 6 cookies per sheet. Bake for 14 minutes or until golden brown, checking the cookies after 5 minutes. Rotate the baking sheet for even browning. Cool completely and store in an airtight container.

If you’re after something lightly different and don’t care too much about looks but more for your eating pleasure, try them out!

12 Comments

Filed under Chocolate, Cookies, Recipes

Blueberry Mini Loaves

Say it with me.

Slowly.

Blueberry mini loaves…

With a smear of lemony creamcheese. It’s not the end yet.

And toasty walnuts.

Got your head around that? I just did, after my second mini loaf. I shouldn’t really be gushing, they are really just blueberry muffins in a different form. And the creamcheese? Just a little softened creamcheese, a spritz of lemon juice and a few tablespoons of icing sugar whisked together. As for the walnuts, I just had some walnut halves toasted in my mini oven. So, it’s just a dressier blueberry muffin, in mini loaf form. But here’s the big deal.

They’re gluten free. And while there may be a plethora of recipes for the perfect gluten free blueberry muffins, they just don’t remind me of Starbuck’s Signature Blueberry Muffins. I sound a little obsessed about Starbucks, it’s just a benchmark I use to indicate how much I love their muffins. I actually crave them. So it’s just exceptionally nice to have a GF version available to ME and the lucky people who live in the same house (haha!)

The muffins are sturdy, meaning they don’t fall apart but are also very tender and don’t have the typical GF flour aftertaste. Unfortunately, its one flaw is that the berries sunk to the bottom but I suppose it could be easily remedied with flour gently tosssed through the berries. I hope.

Gluten Free Signature Blueberry Muffins adapted from Carole Bloom’s The Essential Baker

1 3/4 cup GF flour blend
1/4 cup almond meal
1 tbsp baking powder
1 tsp vanilla extract
1 extra large egg
3/4 cup milk
1/4 cup heavy cream (or milk, if you’re so inclined)
1/4 cup caster sugar
1/4 cup brown sugar
1/3 cup canola oil
1 cup blueberries, tossed in 1 tbsp GF flour (from the 1 3/4c)

1) Preheat the oven to 180 degreesC. Grease 12 regular muffin tins.

2) In a big bowl, whisk the oil, milk, cream, eggs and vanilla together

3) In a medium bowl, mix the flour, almond meal, baking powder and sugars.

4) Tip the flour mix into the liquids and whisk until just combined. You do not want to overmix it, a few lumps are fine. You will start noticing that the baking powder will begin reacting if you take too long.

5) Divide the batter evenly amongst the tin. Divide the berries evenly between the muffin holes (they will sink as they bake, hopefully not right down to the bottom)

6) Bake for 20-25 minutes. (Mine were in mini loaf tins. I got 6 loaves and baked them for 30-32 minutes)

7) Spread with cream cheese frosting and lightly toasted walnuts.

Cream Cheese Frosting

150g softened cream cheese
juice of 1/4 lemon
1/4 c icing sugar, sifted

1) In a bowl, using a spatula, mix the cream cheese with the lemon juice until combined (you could probably use a standmixer).

2) Add in the icing sugar and using a whisk, whisk as hard as you can (so it’s light and fluffy). If not using immediately, store in refrigerator and bring to room temp before using.

19 Comments

Filed under Books, Cakes, Frostings, Fruit, Recipes

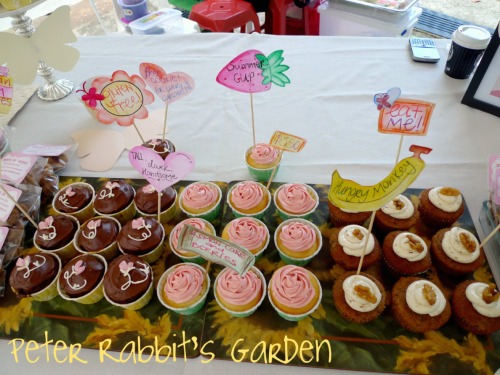
Sweets By Vicky’s 2nd Day Out

Today’s sky was flawless, a striking blue highlighted by the brightest yellow sun. Perfect for a lazy afternoon by the pool, a sleepy nap in an air-conditioned room or some serious catching up on shopping. Quite honestly, it was perfect for anything but cupcake selling, the very thing I was doing. I can handle having pearl-sized beads of sweat or the gross I-totally-need-a-shower-NOW, what I can’t handle is not being able to save my cupcakes from it’s inevitable fate- melting buttercream

Today marked the 2nd edition of the Loewen Garden’s Farmers’ Market and after the great response from the first one, I was all too ready to be a part of this one. I suppose a few factors of today made this 2nd installment less than gratifying (terribly low turnout numbers and the insane heatwave). Well, for the first 2/3 of it I guess. Then, I learned one of the most important lessons of my life.


You see, my parents weren’t here for the 1st market, so today would their first. Call it divine intervention but they couldn’t have been present at a more timely moment. If I had been left to deal with the disappointment of today on my own, I would be sitting under my cupcake table, sooking.

My mum and dad are complete (almost) opposites of each other. My mum’s the one who does all the behind-the-scenes work, the less social, less glamourous part of anything. Dad, on the other hand, is a talkative, loud ball of entertainment. He’s almost akin to a jack-in-the-box, popping out with all sorts of ideas and stories while my mum’s the one who has to make sure everything is running smoothly. I guess that’s how they function as a pair, you couldn’t have 2 of my dads around (total havoc). And that’ how they’ve been present in my life too. So needless to say, mum was the one telling me to keep a smile on my face and not give up. “Positive thoughts,” she said. Dad on the other hand, was galavanting to the other stalls, happily conducting barters (2 cupcakes for a lovely helping of olives). But here’s what they taught me today…

1) Have fun– When I realized that the whole point was to have fun and treat this farmers’ market as a learning experience, I felt less pressure to finishing selling everything.

2) There’s no love like family love– When I sent my elder sister an SOS text, asking her to roll around with positive reinforcement, she got ready in record time and was by my side beforeI knew it. When my dad sent out a text message to my aunt, letting her know that I was having a cupcake stall, she immediately drove round, cash in hand, ready to buy everything. My other aunts popped by too, getting cupcakes for friends, other relatives and tomorrow’s breakfast. My uncle had my mum bring a lunchpack he had specially made for me in case I got hungry.

3) Shit happens, but keep smiling– The slump in attendance numbers, the bad, cupcake unfriendly weather, the wasps, the aching feet…I found myself consumed with being negative I probably drove all the happy thoughts away and attracted every single wasp. I didn’t realize all the storeholders were also having an off-day. But when it reached closing time, we all exchanged our goods, cupcakes for you, lemon slice for me, cookies for you, organic apples for me…And that, is how you make the best of a dratty situation.

Thanks for everyone who came out today (love to Vee, Sling & Ryan too) and for all the words of encouragement in your comments and…for reading this! I HOPE THINGS PICK UP FOR THE NEXT EDITION! But til then, recipe tomorrow!!!

14 Comments

Filed under Events

Earl Grey Friand (Financier) + Rosewater Glaze

Amidst all the baking in preparation for the farmers’ market this Saturday, 6 March, I felt like I needed to be selfish and bake something for me. Not for sale, not for someone else’s consumption, for me (and my mom). It would be good to note that this ‘just for me’ baked good, will eventually make it’s way to my mom’s colleagues because we won’t be able to finish it. Let’s just say, baked goods in this household is like haute couture fashion- today’s is tomorrow’s so passe.

But before I go on, indulge me and allow me to share my not-very-smooth-sailing preparations for the market.
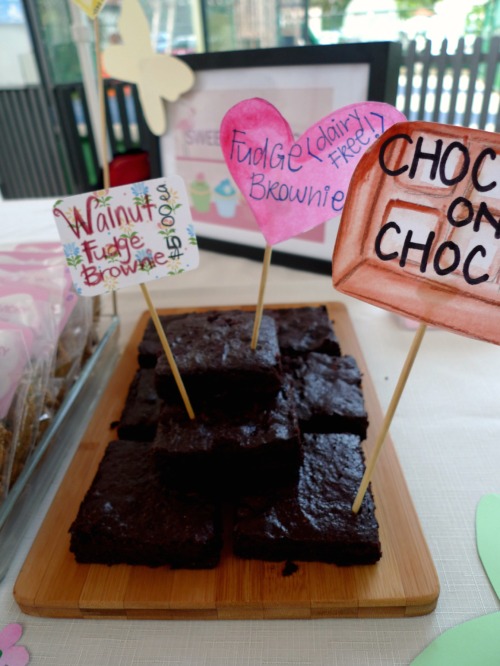
1) My brownies stuck to the pan so will now be sold as brownie bites, terribly cute, and obviously better for you as smaller bites = smaller waistline (or so I am inclined to think)
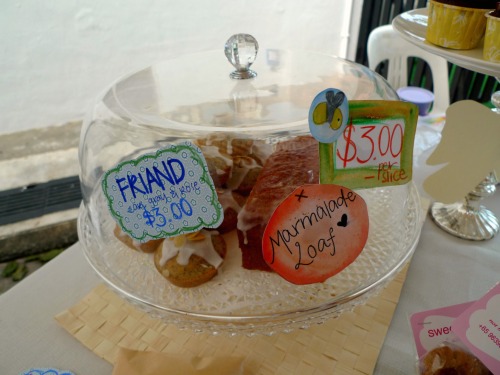
2) My marmalade loaf overflowed. No drama there though, just extra for me to eat (all the overflowed excess). Lucky it’s still rustic looking and tastes as good as usual.
3) The weather is horrible (which isn’t a fail on my part) but means seriously re-shuffling of my baking/frosting schedule and OT on Friday night.

Moving along to my reward, today I baked friands, or what some other people who don’t follow the aussie-food-of-thought call financiers. I prefer friands just because it sounds more like ‘friends’ and not some scary grey suit wearing, skinny, thick bushy eye-brow, long sharp faced man who sits in his office and calculates my debts/taxes/income (If you haven’t seen Confessions of a Shoppaholic, please do! You’ll totally get my reference)

The recipe comes adapted from Donna Hay’s Modern Classics Book 2. Her recipe is for a berry friand; short, dense and studded with raspberries. But I was feeling more earl grey today so I didn’t add in the berries and whizzed the almonds with dried earl grey tea leaves I just removed from 2 teabags. And in order to make this dairy-free, I didn’t use beurre noisette (blasphemy!) but used canola oil instead. I suppose with the taste of earl grey lacing the friand, you probably wouldn’t miss it too much.

Sweets By Vicky Earl Grey Friands with Rosewater Glaze (makes 10)

6 tbsp canola oil
2 tbsp freshly squeezed orange juice
1 cup almond meal
Earl Grey tealeaves from 4 teabags
1 1/2 cups icing sugar
3/4 cup GF flour blend
3/4 tsp baking powder
5 egg whites (large)

1) Preheat the oven to 180 degreesC, fanforced. Grease 10 muffin tins (I used mini bundt tins).

2) Place the almond meal, half the icing sugar and tea leaves in a food processor and whizz for 10-15 seconds or until leaves and almond meal are finely ground.

3) Add flour, remaining icing sugar and baking powder to the almond meal mix. Whizz for 5 seconds to mix.

4) Add in the oil and whizz for 10 seconds. Mixture will be insanely sticky.

5) In a large bowl, using an electric mixer (hand-held is fine), whisk the egg whites until foamy, about 1 minute.

6) Add the batter to the egg whites and fold to blend. Don’t worry about deflating the egg whites too much, friands are meant to be dense and moist.

7) Reduce oven temperature to 170 degreesC. Distribute evenly between the prepared muffin tins and bake for 15-20 minutes or until golden and springy to touch but moist in the centre.

8) Let cool in tins for 10 minutes before unmoulding and spreading rosewater glaze.

Rosewater Glaze

1 cup icing sugar, sifted
2-3 tbsp water
1 tsp rosewater*

1) In a bowl, mix the icing sugar, 2 tbsp water and 1 tsp rosewater with a whisk. If mixture if too thick, add in water, teaspoon by teaspoon. The icing shouldn’t be too viscous and should fall sloooowwllyy from the whisk when lifted.

*Rosewater is available from many middle eastern shops. I got mine from an Indian provision store though!

15 Comments

Filed under Books, Cakes, Inspired, Recipes